Thursday, August 31, 2017

Ugly Cockpit Part 2

 The work had continued during the late fall and winter months of 2016. Finding the voids, and drilling or routing them out so no hollow spots or tunnels made by voids remained took much time. The cockpit floor had many and I had proceeded to fill voids with filler in stages. The larger voids would be filled and sanded, then I would smooth over filler on the smaller voids.


Outside and inside corners were more challenging than the flat surface. One needed to be careful to shape the filler. On inside corners it was more of a challenge to sand the filler.

I must have enlarged my bicep by four inches after the sanding season was over. There was much work and effort performed here, and I have heard that preparation before spraying is 90 percent of the work. This effort felt like 190 percent of the work. Still I would sit in the cockpit on a nice sunset evening enjoying the moment, and occasionally notice the ugly looking cockpit; at such time I decided it is time to at least improve my recreational surroundings, and besides, it will increase my skills at body work and gel coat work.


Wednesday, August 23, 2017

Ugly Cockpit: Drilling Out Voids


Picture of the cockpit from the position of sitting on the bulkhead. The white tarp provides a dry and work area less wind, and sun. White tarp allows light into the area so it makes it easy to see the areas I need to address.

I spent many weekends during the winter months of 16-17 sanding, drilling and doing the body work to seal holes made by voids and other unwelcome surprises.


The wood that was on top of the cockpit coaming had been removed. The removal required me to slip a sawzall blade between the fiberglass and the wood trim and saw away. The bolts and adhesive just about made it impossible to remove the wood using any other method. The picture of the port side of the cockpit coaming also hints at the absence of the cockpit locker lid. These locker lids needed to be removed as well; they became their own project.

The cockpit had stereo speakers mounted aft within the cockpit. I am not a big fan of music in the cockpit for several reasons; 1) the magnetic field from the speaker may interfere with the compass and 2) listening to music although very enlightening and romantic in essence does oppose the safety rule of seamanship where one must always be alert by keeping watch with sight and sound -- eyes and ears --, and lastly, any big wave would have no trouble sounding out music while it crashes upon thy melodious moving it through onward to the depths of the cockpit bilge.

With that said, I didn't want to take on another project of closing the speaker holes; rather, I left them open and will replace with speakers and decide to fix with deck hatches.

Performing body work on inside corners are always a challenge; there is the limited angle caused by the inherent restricted area. Dye bits on grinders, or drill is limited, sanding becomes more of a challenge to when trying to get the perfect angle on the void.

The pictures on this post merely are examples of the early stages of prepping the cockpit for the refresh. After voids are examined for depth and length, filled, sanded and faired, the later stages of gel coat application would be served.

Monday, August 21, 2017

Ugly Cockpit

During the months of October to January, I started work on refreshing the cockpit. Everything would come out of the area. I took a few pictures so viewers can see how ugly the cockpit had become.

There were many voids, scratches, chips and cracks in the gel coat. The sun had also played a nice part in helping to make the cockpit look terrible. The wood that surrounded the cockpit was always adding time to the sanding and vanishing. Moist air form the cockpit lockers would permeate through the screw holes (holding the wood to the cockpit coaming) that the varnish would lift up from the wood. I decided to remove the troublesome wood.

The binnacle had been removed and it was not too easy. Bolts and cables were removed, and the boat was already on jack stands so easy does it when hoisting down a ladder. One can see the condition of the gel coat from the picture. Upon closer examination, I was able to see many pin holes from voids on the sole of the cock pit. Each void would require close inspection to determine if it traversed under the gel coat to other areas. I had no desire to revisit this area as a result of voids that I missed at this time of the work.

Of course when looking at a job like this one starts to ask the question "What have I gotten myself into?" I knew the if I could take the unit home, I could work on it in my garage. I would need to sand the paint off and paint new. Inspect the compass for leaks and replace or repair.

Here is the binnacle ready removed and resting on the cockpit seat.

During the winter month I did polish the ss wheel and U-Bar, cleaned the compass, replaced the wiring and cables, and repainted it. The plastic parts that were caps, or lids were repainted black.

A future update will display a reconditioned unit. Please keep checking back here. I have been so busy lately that the posts have stopped; however, I have taken many more pictures and will share more very soon.

Side note - If one were to pay someone to re gel coat an entire cockpit the labor costs alone would be very high. The amount of grinding, sanding, body work, and finally spray gel coat process demands a lot of time. I did the work because I am able, and when I sit in my boat I do not wish to be reminded of all the things that need attention. Once pictures of the finished job is posted, one may appreciate the "labor of love" aspect.

Wednesday, March 8, 2017

Binnacle Work Update


The previous post displayed pictures of the condition of the binnacle. After removing places and mounts each part was cleaned and wire stripped or sand blasted of paint and dirt. Some of the plates were pitted and they needed the indentions to be filled with filler in order to create a smooth surface for the primer and paint.

I discovered several parts that needed to be improved, fixed, or replaced. The list below indicated the areas need of attention:


Compass had a Bubble - may need to replace if can not fix leak.

Throttle Cable Worn in Protective Cover - replace cable.

Compass Light Wire Splices - too many splices discovered. Replace wire.

Steering Mechanism Lubrication - Apply new grease to gears.

Binnacle Metal Plate Pitted - lean, prime and repaint.

Fasteners Distorted - replace screws

Binnacle Guard Dirty - clean and buff the rail to a shine


While I apply effort on the above list, I have ordered a new cable and have spent time repairing cracks and chips in the cock pit ice box lid. Three other cockpit lids are getting scrutiny as I make plans for work on them.

Tuesday, February 14, 2017

Cleaning for a New Direction

The work in the cockpit has taken a pause on account of the weather, I have been working inside where heat is easier to apply to the work area. My work shop is filled with epoxy type work and some of my projects are in the garage. I took the binnacle off Great Ketch and hung it from the beams in the garage. Note how it is suspended so that I need not require hunching over the project.


Objective: Clean the binnacle, remove the flaking paint, clean the throttle mechanism, repair any issues in the throttle/gear box, paint the aluminum parts, polish the stainless steel guard, lubricate moving parts, and add fluid to the compass.


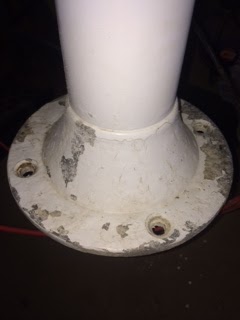
The pictures show the areas where the paint starting flaking off the aluminum. When the paint is scratched, chipped, or worn then water can easily find its way between the metal and the paint. When water becomes trapped under the paint you can bet that corrosion will be the result. The best way to avoid the flaky popping bubble type of paint flaking is to try to prevent it from happening at all. Typically areas where metal has attachments points (Screws, bolts, or other) it is common for paint to be scrapped off or chipped. Once that tiny hole is available for water, its only a matter of time before water works is way under the paint.


On Great Ketch, one can see the most damage at the base, where there were many dents, and scratches and on the plate, where water sat and found its way through tiny holes where screw holes were. I took a wire brush to the base and the paint flew off just from the breeze caused by the rotating wire spindle. Seriously, the paint was in very poor condition.


Removing the stainless screws that held the plate onto the binnacle post was a challenge. The screws where frozen in the aluminum mount and it required two days of penetrating fluid and large screw driver and impact driver to coax and tease the screws out. The key is patience and vibration.

Once the cockpit has been completed in the spring -- I will gel coat the entire area -- then the refreshed binnacle will be placed into the boat and cables connected.

These 33' cat ketches were originally designed for a tiller. Note how the transom hung rudder extends higher than the cockpit. Hull #1 has a tiller and I believe Hull # 2, The wheel was an option during the build from order.

The picture toward left shows the binnacle without the compass, compass mount, stainless steel support mounts, and the throttle and gear box. Once I have completed this project I shall post the final project.

Monday, January 23, 2017

Happy New Year 2017

Happy New Year 2017. 

Great Ketch has is on the hard and been getting much attention; all in the winter project category. These projects are separated into three main areas.

1) Cockpit Refresh: bodywork to fill dents, gauges, scratches, and voids, and sanding as part of preparation for a new spray gel coat finish – to be sprayed during the warmer months of spring. This project requires the most hours of labor. There is much sanding to be done, shaping, and prep work before any gel coat is applied. One can see the amount of voids the cockpit possessed. I suspect that these cat ketches were not vacuumed cured. Helm steering binnacle will be cleaned and painted where appropriate. 

2) Stanchions: two new stanchions were fabricated so that I can fix a gate on starboard and port side of Great Ketch; old stanchions will be refreshed. New lifelines and appropriate hardware.

3) Miscellaneous: these projects include, hot water removal clean and refixed, new thermostat and new hoses. cockpit locker bilge area to be cleaned and repainted, cockpit locker lids reinforced with fiberglass/epoxy and new vents for waste tank and propane locker, new shorepower electrical wire inside boat, replacement of 30amp shorepower plug with SmartPlug, and electrical work. Varnish work on cabinet door and cabin sole bilge panel.

Three areas of project work is plenty when one considers the amount of work required for any one specific task; therefore, my future blogs will address the different projects and progress made. This blog entry is to provide readers with advanced notice of the content to expect within the next few weeks. These projects will each be assigned their own blog posting. 


Although not a movie trailer, the pictures below represent part of the three project areas that are worked interchangeably and intermittently during the winter months.


Saturday, August 6, 2016

Holding Strong - Mantus Anchor Helps One Sailor to Sleep Better

What a difference an anchor can make in improving one's ability to sleep when spending a night on the hook.

I enjoy the experience of being on the hook during the night. Relaxed in the cockpit as the sun sets and feeling its warmth slowly temper to a calm coolness; laying on my back looking toward the glittering wonderment sparkled about the deep blackness, and the feeling with eyes closed of the gentle sway underneath my spirit; all has always been my enlightenment.


For years my Bruce anchor has treated me well, yet, I knew it was an old style designed anchor and my research has prompted me to purchase one of the new design anchors such as a Mantus anchor.

There is much information about the new design anchors compared to old style anchors, and readers must  form their own judgments pertaining to anchors. My intention is to not commence another anchor war debate - as there are many already about on the sailing forums - rather to share with readers my experience using the Mantus anchor.

A visible comparison of the old style and new style anchors is worth noting, and for myself, I see the difference plainly when I compare the design of the Mantus with the Bruce. The most obvious difference is the "roll bar." The Mantus has a "roll bar," and the Bruce does not.  The advantage of a roll bar is that it helps the anchor to set quickly. The negative of the roll bar is that it may pose a challenge for some pulpits when mounted.  My set up places the roll bar forward of the bow pulpit and avoids contention for space.


In order for the new Mantus to set well on my pulpit I purchased a Mantus bow roller.  The bow roller allows the Mantus to sit securely on the pulpit in the roller while placing the anchor forward of the pulpit. In the picture one notes the roll bar clear of the puplit and forward. Interestingly with humor, one of the fellow sailors in my marina thought the roll bar to be made as a handle so I can carry the anchor about easily -- It does make a nice handle, and that may have been a side benefit of the roll bar; however, I suspect it was not the primary reason to design such a "curve" appeal.

Setting the Mantus is very easy and she grabs quickly. My Bruce would drag slightly before finally setting; in contrast, the Mantus grabbed quickly, and, if it did drag it was too slight for me to notice.

In addition to the bow roller I added the optional Mantus mate. The mate hangs below the roller and offers additional stability to the anchor as well. The roller and mate are adjustable to accommodate different angle of bows and anchor placement. The system is a complete easy to install, easy to use, and easy to adjust system.

Conversations and emails with folks at Mantus Anchors was great. My emails were answered promptly, my calls always led to someone to speak about the product and related matters; moreover, they provided advice and ideas to mitigate any potential problems I might encounter in setting up the roller, mate, and anchor. Excellent customer service.

After several overnights on the hook,  I feel the Mantus has improved my boating experience; I look for more opportunities to anchor out overnight, I sleep better while on the hook, and am able to handle the gear easily with my manual windlass without issues.

Side Note - I have not had an opportunity to test the Mantus in winds over 20knots --- I am not a tester or reseller by profession, nor am I paid for my opinions and comments on any product in my blogs.

I am the first owner of a Mantus at my marina, and it has brought the attention of others. I have a hunch that others will be acquiring a Mantus anchor as well. Some have talked about purchasing a larger anchor and then stowing it apart and taking it out, -- connecting the parts together, the anchor plate to the shank, and then the roll bar-- for times when they may need more security. One of the nice things about the anchor is its ability to be taken apart for stow.


Picture toward left is of Great Ketch at anchor with the Mantus down below at the bottom of the lake, the Bruce anchor rests in its roller in the pulpit. This picture was taken at 6am in the morning.