Saturday, July 17, 2021

Stepping the Main Mast


I often am asked how do I step the free standing main mast. Most folks assume that the need for spreaders to be important to using a Gin pole to step a mast. I do use a Gin pole lift; a looped strap is set about two feet below the steaming light. Attached to the hook holding the strap I use a line with bowline knot to the hook. The line runs from the hook to below the boom track used to connect the boom where it is wrapped around the mast ten times. The load of the lifting of the mast is from the wraps around the mast while the hook holds the mast steady and helps lift mast upright.

Several friends stopped by to help, but it is possible for only two people to step the mast, which is 48 feet.

Below are some picture taken that may help demonstrate how the mast is stepped.


mast step loop <-- I am wearing the hat and hooking the strap loop around the mast

raising the mast <-- Mast raised by loop strap

strap loop <-- Note the Gin pole cable to the loop strap and the working line at base

mast raised <-- Friend using halyard to control swing of mast at masthead

mast step <-- Note the loading line wrapped around the mast leading to the loop

Mast step <-- the mast is raised behind the Gin pole arm

 < -- Adding a control line at base to help guide mast over to boat

 < -- Mast moving over toward boat

 <-- Inserting mast through the deck collar

 < -- No shrouds or stay hardware to adjust


Thursday, June 24, 2021

Painted Mast Work Summary

 Steps for painting the mast of Great Ketch


  1. remove all hardware from mast and tape sail track
  2. sand off old paint and primer off mast
  3. inspect mast for voids and other imperfections
  4. clean mast with solvent and (use wax/grease solvent, wipe-down solvent)
  5. mark areas with tape that require body work
  6. use sand paper and or drill with die to remove cracked old filler, and shape void for filler
  7. clean area second time before using voids
  8. fill with Awlgrip Alfair
  9. sand filler after it has cured
  10. spray a dusting of Awlgrip 545 primer on entire mast (1.4 tip 10 percent thinner)
  11. repeat inspection of mast and repeat previous steps for missed areas
  12. clean and wipe down entire mast (use wax/grease solvent, wipe-down solvent, and tack rag)
  13. spray 5 coats of Awlgrip High Build primer entire mast (2.0 tip and no thinner)
  14. sand High Build to remove orange peel and shine using 120 - 220 paper
  15. if pinholes are discovers fill them now with filler
  16. clean and wipe down entire mast  (wipe down and tack rag)
  17. spray 5 coats of Awlgrip 545 finishing primer (1.2 tip and 10-15 percent thinner)
  18. sand with 400 grit
  19. clean and wipe down entire mast (use wax/grease solvent, wipe-down solvent, and tack rag)
  20. spray with AwlCraft 2000 paint
  21. install hardware
Of course with the above steps one must note the product's guide to ensure proper temperature, humidity, and timing when laying down overcoats; moreover, note the size of the spray tip when using the product and adjust the reducer accordingly.

Lastly, perform the same steps on the mizzen mast. 

Monday, June 21, 2021

Main Mast Work Part 2


Main mast work part 2: Applying finishing primer and Awlcraft 2000 finishing paint.


After the High Build was sprayed onto the mast and sanded smooth, the next step was spraying the Awlgrip 545 finishing primer. Five coats of the primer was applied and the final coat was sanded so the Awlcraft 2000 paint can be sprayed. 


The picture above displays the final coat of the Awlgrip High Build product. Note the orange peel texture and the slight shine. This product needs to be sanded to remove the orange peel and the slight gloss - the lighting is causing the orange color look and the picture on the above right is under the tarp section of the painting area so the lighting is more natural.


The mast was sanded after five coats of the 545 finishing primer using 400 grit paper, but before the 545 was applied, I discovered 12 pinholes. I filled the holes with Awlfair filler. 


Five coats of Awlcraft 2000 has been sprayed on. The mast is looking liken a new mast.


The main mast has been placed on a Harbor Freight trailer that is used as a dolly. Ready for transport back to the marine to be stepped on the Great Ketch. 


Main mast transport


Sunday, June 20, 2021

Main Mast Work Part 1


Part 1 of the mast work performed on the main mast: filling, and high build primer.

I have displayed a few pictures showing the work performed on the main mast.


Main Mast voids
I sanded the old paint and primer off the main mast. The paint was thin and the mast had a few dings in it. I also wanted to inspect the mast under the paint and primer. I noticed small voids and areas where the original fairing compound was cracking or just coming out.

I used a die on my drill to get the voids shaped better for new filler and I it was easier to remove the old material.
Main Mast voids
<-- In this picture it is easy to see the small holes along the edge of the original filler. Out it comes so new material can be added.
Main Mast Voids
<-- Look at the many colors of original material used for the mast. All this was under the white old paint.
Mast with Awlfare
Here in this picture the primer 545 has been sprayed and that allowed me to see where I needed to add more Awlfair product as shown in the red color. -->
Awlfare on Main mast


Another example of how the fiberglass underneath is shown as ripples in some areas. This Awlfair will help and the High Build primer will also help to smooth out the area. -->


High Build Orange Peel
<-- The surface of the High Build left an orange peel texture and that made it very easy to see the areas I needed to sand smooth in order the the primer 545 to go on. The High Build did a great job of filling in the areas where fiberglass texture was bleeding through, more pinholes, and other imperfections. I had a difficult time acquiring the High Build on account the distribution of the product was hampered as well as a fire at the plant that makes the product. I purchased the High Build from a place in Florida that had one one gallon in stock and I ordered the converter for the High Build from a place in Rhode Island.


High Build
<-- Here is the mast with the orange peel sanded off and the mast smoothed out. It only needs a wipe down before spraying the 545 primer.

Thursday, June 10, 2021

Using Awlgrip

Allfair
 I decided to use the Awlgrip products after spending the winter time researching different paints. The first product to use is the Awlgrip Awlfair to fill in voids and larger holes and imperfections and accidents. Awlfair is a two part mix and spreads easily.

After the Awlfair was applied and sanded, I sprayed one coat of Awlgrip primer 545. This coat allowed me to see any imperfections with greater detail because the mast is white  - one color. I applied the Awlfair once again to any areas I missed.

High Build
Once satisfied with the work using the Awlfair and with the mast sanded and cleaned I applied five coats of Awlgrip High Build. This two part epoxy mix was sprayed and on the final coat sanded. High Build did a great job of filling very tiny imperfections.

Once the mast was sanded smooth on the High Build and wiped clean, I sprayed five coats of the AwlGrip 545 finishing primer. 
Awlgrip 545

The product I am most interested in using is the  Awlcraft 2000 paint. This is a softer paint and reported to be polishable. The soft attribute of the paint is more important to me because the masts are carbon fiber and s glass - they flex.  I was looking for a paint that was not brittle hard. A paint that is elastic is less prone to developing micro cracks.

At the time of the posting of this post I have just finished spraying the priming 545 on the masts. Future post will show the Awlcraft 2000 surface paint.


Sunday, June 6, 2021

Mast Painting Staging Area

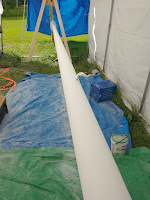
 When I decided to paint the masts of Great Ketch I knew that it needed to be done at my home. After I transported the masts - one at a time - to my home, I used the overhang behind the garage to suspend the masts, I then used a 10 x 10 foot tent to fasten a tarp over in order to keep the masts out of direct sun light.

One tarp that measured 6 x 30 feet was used to create a wall to protect the masts from wind - white tarp wall toward the right in the picture. The tricky part of painting masts outside yet under cover is one can not control environment. I wanted to have some ventilation so the ends were kept open and typically the breeze comes from the north end of the area to the south area.

My set up wasn't perfect  but I was at home with all my tools such as air compressor, electric, water, restroom and fridge. 

The picture on the left is displaying the main mast with all the old paint sanded off. The straps suspend the mast and allows me to rotate the mast to sand all areas. The base of the mast is in the foreground; toward the mast head is a blue tarp over a tent frame. When it was time to spray, I placed tarp on the floor from base to the head of the mast.

Thursday, June 3, 2021

Transporting the Masts

 I wanted to paint the masts but not do the work in the boat yard because of the amount of dust and traffic in the yard. The best place for me to perform the work would be at my home behind the garage.

I used a 10 x 8 foot board attached to the mast head that made it possible to fasten to the hitch of the truck.

Towing main mast
The harbor freight trailor used is placed so the the weight of the mast is supported. Having the mast on the trailer aligned in the center prevented tire drag. 

Having a person follow was helpful to keep an extra set of eyes on the tow while also adding safety to the transport. I traveled 16 miles from marina to my residence on all back roads.

Mast Transport
The masts were transported in September of 2020. My plan at that time was to sand the old paint off and inspect the integrity of the carbon fiber/S glass underneath. 

The masts were built in 1988 and the paint was becoming thin with scratches and some bubbling underneath caused by moisture getting between the winter tarp and the mast - effectively creating a green house effect. In the past, I used white paint to just cover areas where the glass was starting to become exposed, but it was time to strip the masts and paint the entire masts.